How to Create a New User in Windows for TLauncher
Creating a new user in Windows is an effective way to differentiate access rights to files and settings on a shared PC. Unlike Microsoft family accounts, which allow you to resort to parental control functions, a regular user account provides greater independence and privacy. In this article, we are going to tell you how to create such a user.
Contents:
Creating a New User in Windows 11
Creating a New User in Windows 10
Creating a New User in Windows 8
Creating a New User in Windows 7
Creating a New User in Windows 11
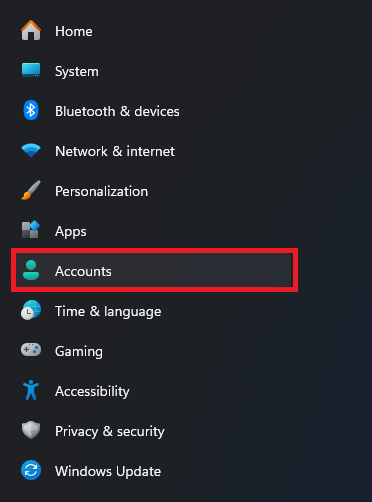
Step 1: Open the account settings
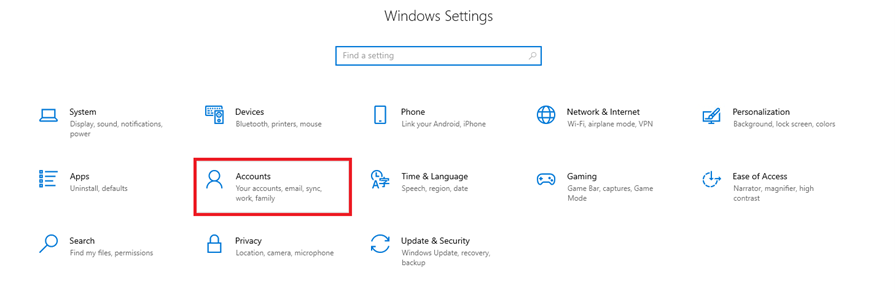
Open the Start menu and select ‘Settings’ indicated by the gear icon, or press Win+I for quick access. In the settings menu, go to the Accounts section.
Step 2: Add a new account
In the Accounts menu, select the Other users tab.

Click on the Add account button in the Other users section.

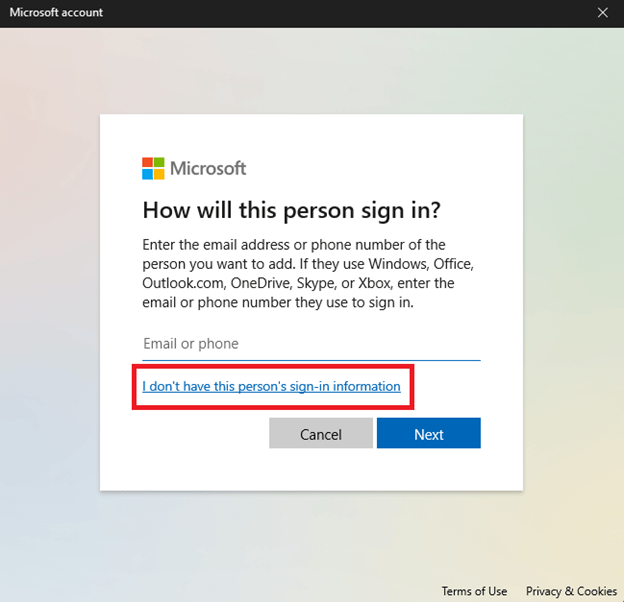
Step 3: Add a user without a Microsoft account
In a new dialog box, you will be prompted to enter your Microsoft account login information. However, you should click ‘I don't have this person's sign-in information’ at the bottom of the box.
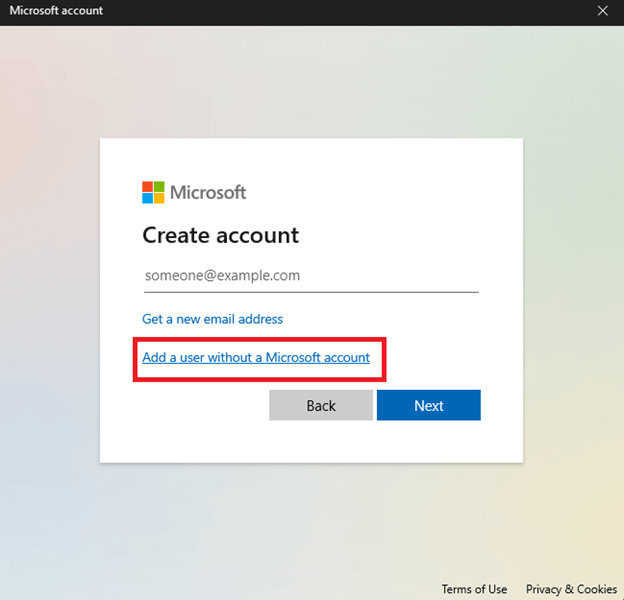
Then, click ‘Add a user without a Microsoft account.’ This will allow you to create a local account on your PC.
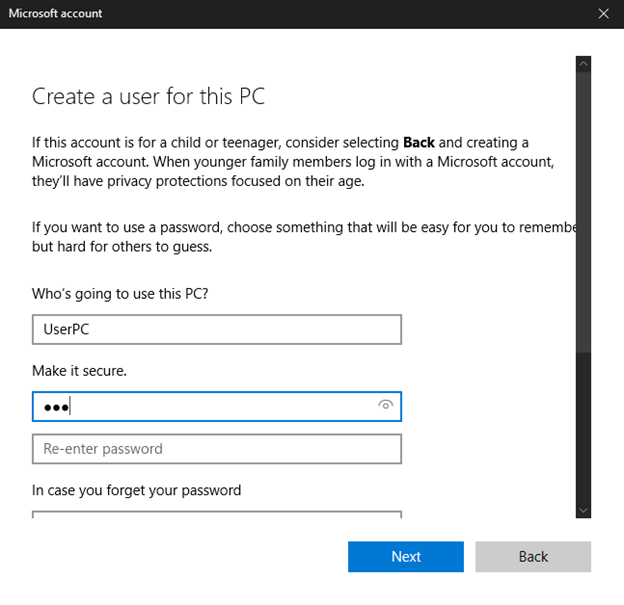
Step 4: Fill in the new user's details
Enter a username for the new account. It will be used as the login and displayed on the welcome screen. Set a password for the account and confirm it by typing it again in the appropriate textbox. Besides, you need to formulate security questions that will help you if you forget your password. Then, click ‘Next’ and follow the instructions to complete the account creation process.
Step 5: Change the account type
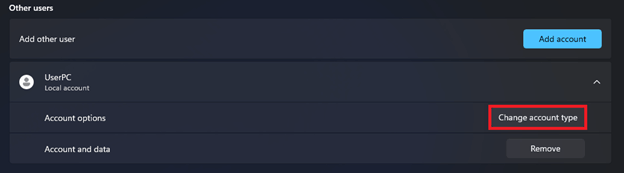
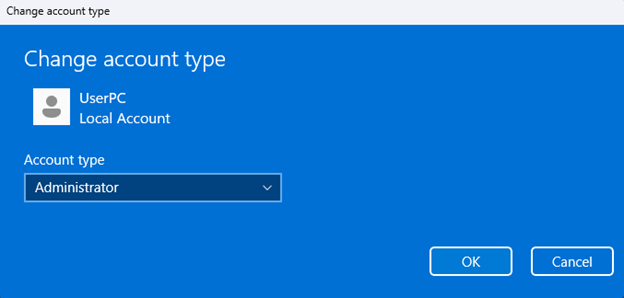
After creating the account, you will be able to configure its parameters, namely grant administrator rights. To do that, open the Other users section, select the created account, and click the Change account type button.
Creating a New User in Windows 10
Step 1: Open the account settings
· Click the Start button or the Windows button on your keyboard.
· Select ‘Settings’ indicated by the gear icon.

· In the settings menu, go to the Accounts section.
Step 2: Add a new user
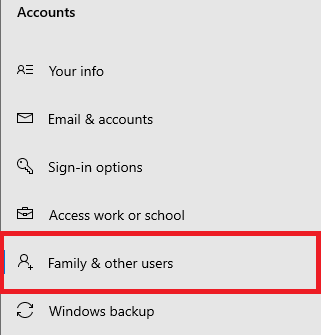
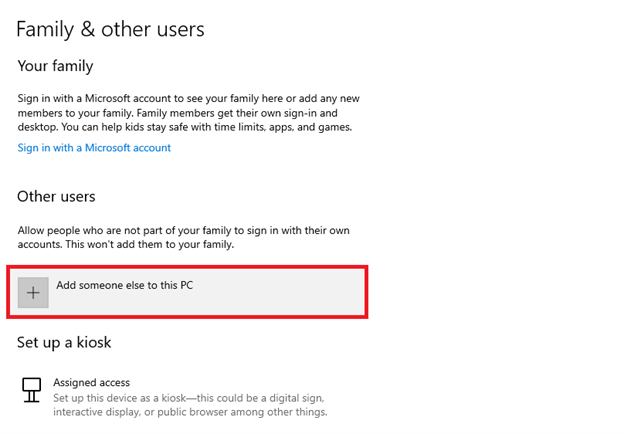
· In the Accounts menu, select ‘Family & other users’ in the left part.
· In the Other users section, click the Add someone else to this PC button.
Step 3: Add a user without a Microsoft account
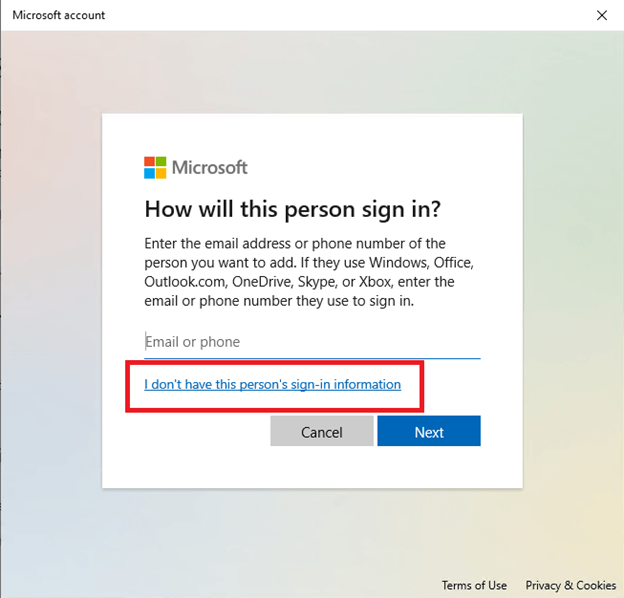
After you click the above button, a pop-up window will appear. To create a local account unrelated to Microsoft and parental control, click ‘I don’t have this person's sign-in information.’
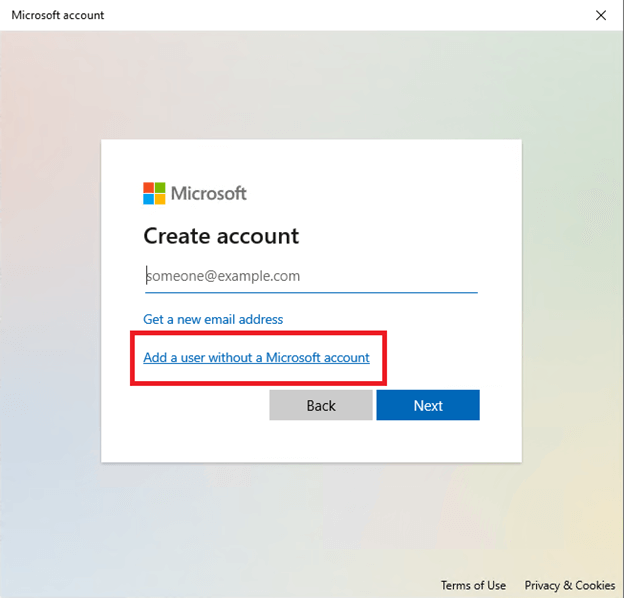
On the next screen, click ‘Add a user without a Microsoft account.’
Step 4: Complete the account’s creation
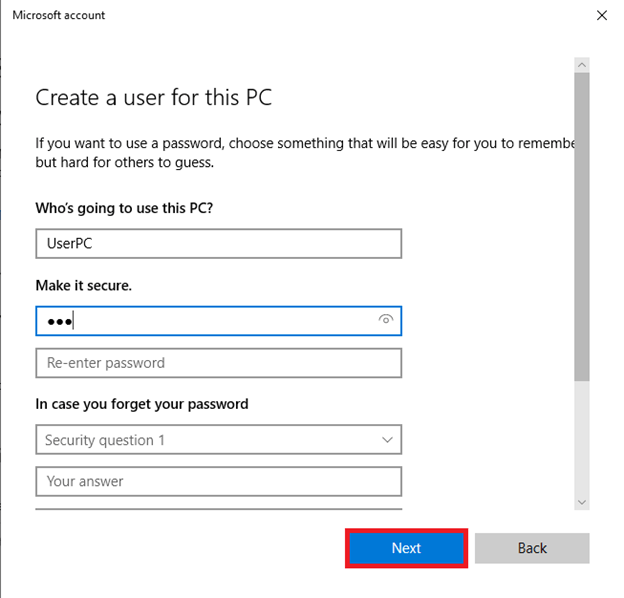
Enter a username and password twice. A tab with three security questions will appear at the bottom. You cannot leave them empty, as they are mandatory, and you will not be able to create a user if you do not add answers to these questions. After filling in all the required fields, click ‘Next’ to complete the account creation process.
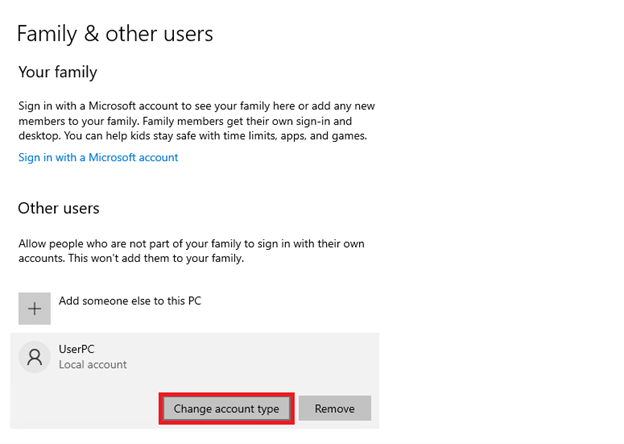
Step 5: Change the account type
The new user has the standard rights by default, but if you wish, you can change it to ‘Administrator.’ To do that, go to ‘Settings’ à ‘Accounts’ à Family & other users.
Then, click the LBM on the created user. A special section will appear where you need to click on the Change account type button.
After that, a pop-up window will open. Change the account type to ‘Administrator’ there and click ‘OK.’ That's it — the new user is granted with the admin rights.

Creating a New User in Windows 8
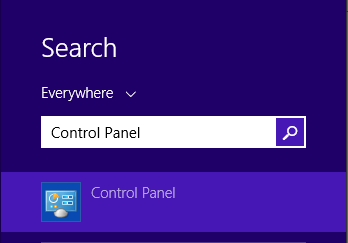
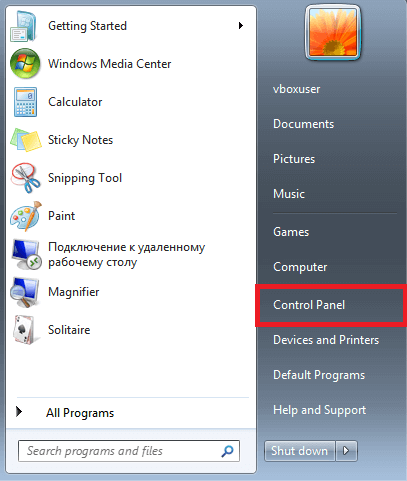
Step 1: Open the Control Panel
Click the Start button in the lower-left corner of the desktop screen or press the Windows button on the keyboard. Then, type ‘Control Panel’. It is not necessary to click the Search button, as the result will be displayed automatically after you type the phrase. Finally, just click on the Control Panel button to open it.
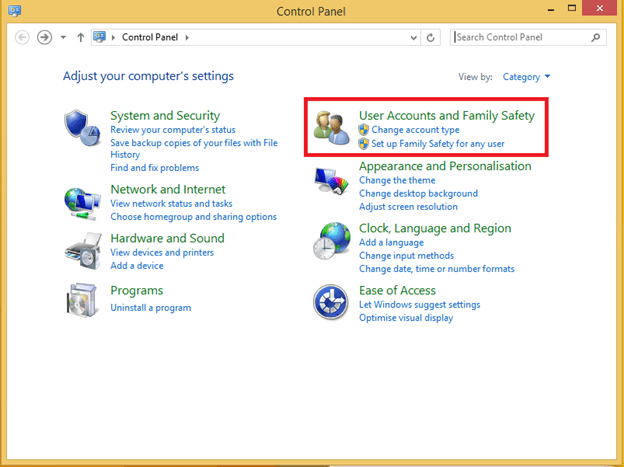
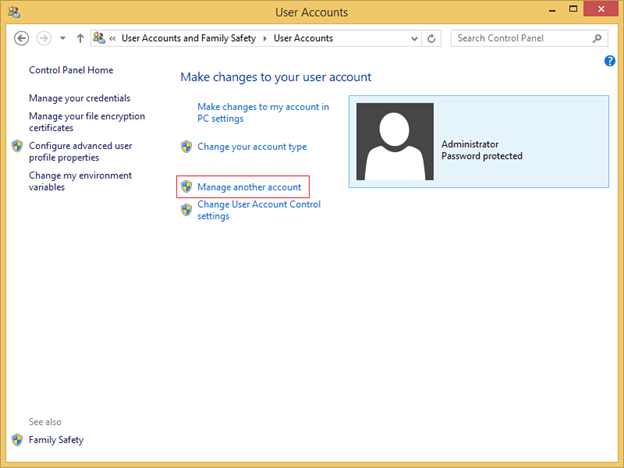
In the Control Panel, select the User Accounts and Family Safety section and then the User Accounts section.
Step 2: Add a new user
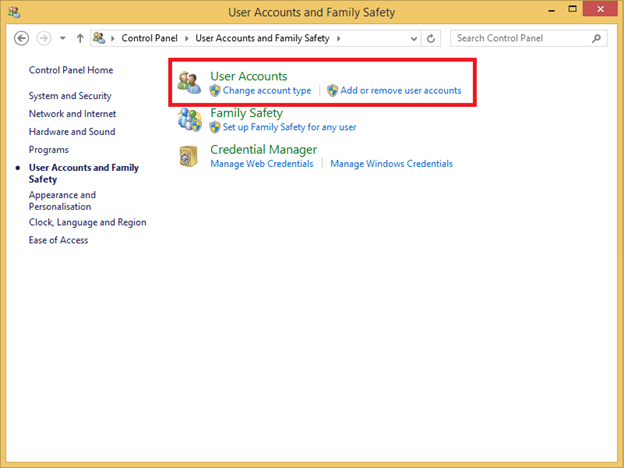
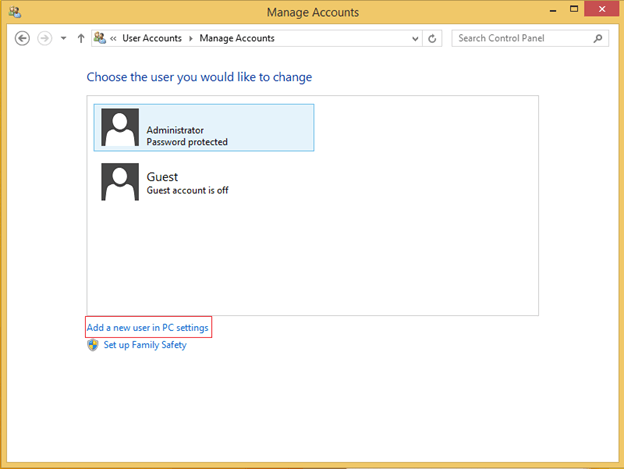
In the User Accounts section, click ‘Manage another account.’
Then, click ‘Add a new user in PC settings.’
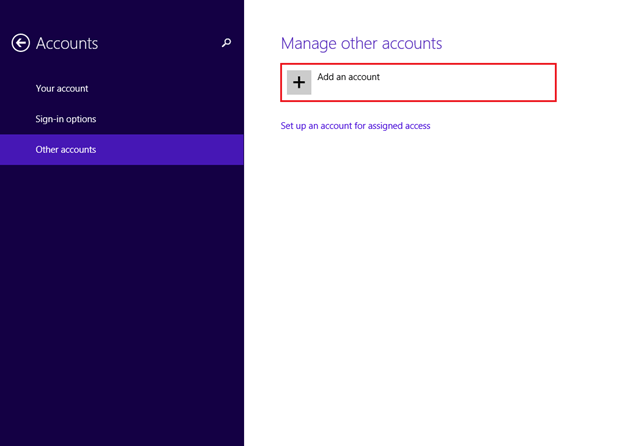
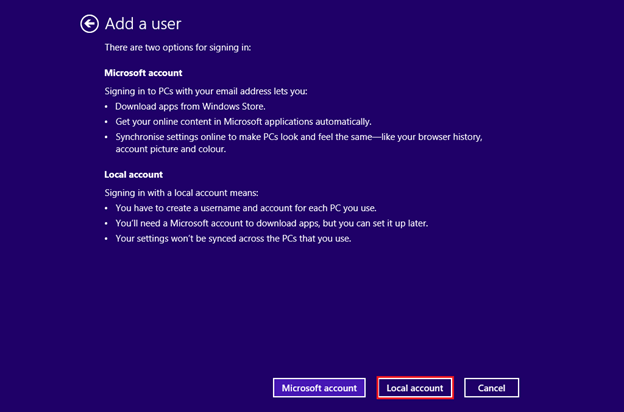
Step 3: Add a user without a Microsoft account
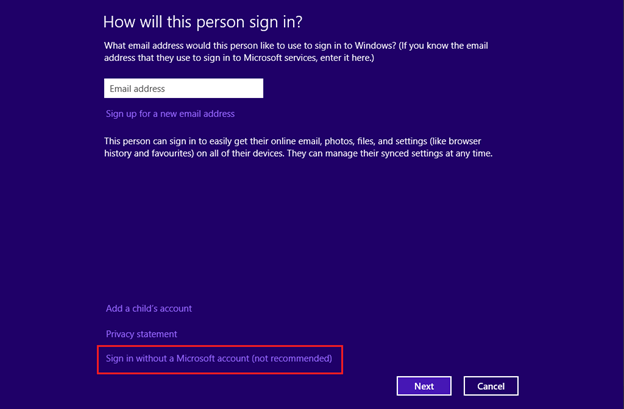
After that, the PC settings screen will appear, where you should click ‘Add an account.’ To add a user without a Microsoft account, click on the Sign in without a Microsoft account (not recommended) button at the bottom. After that, click ‘Local Account’ to start the process.
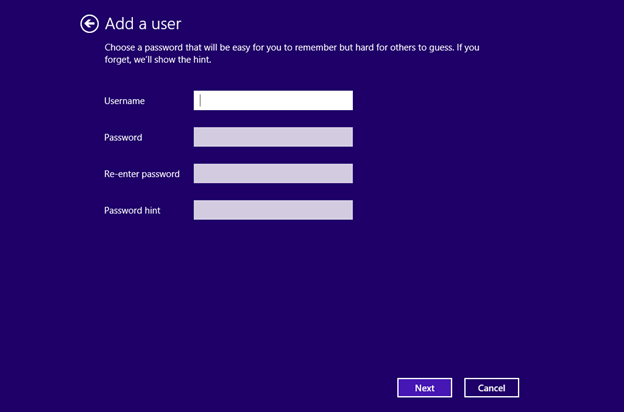
Step 4: Fill in the mandatory fields
Enter a name for the new user. It will be used as a login and displayed on the welcome screen.
Set the password for the new account and confirm it. The password is not mandatory but is recommended for security reasons. You can also add a password hint to help you remember the password in case you forget it.
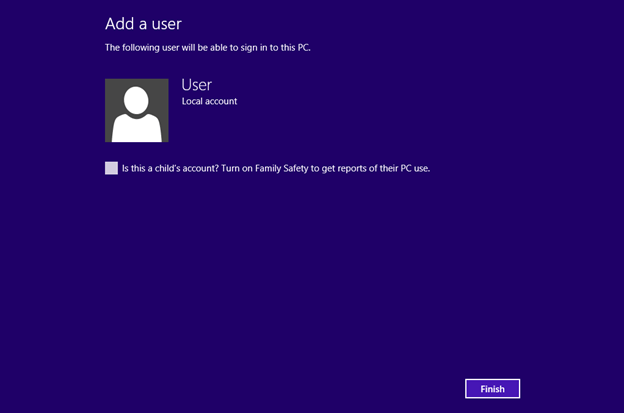
Click ‘Next’ and ‘Finish’ to complete the account creation process.
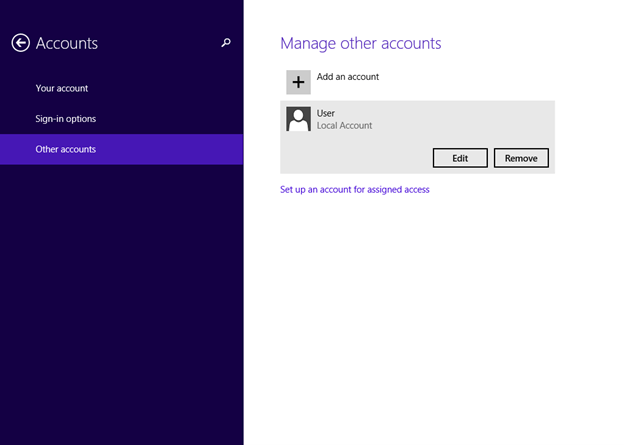
Step 5: Change the account type
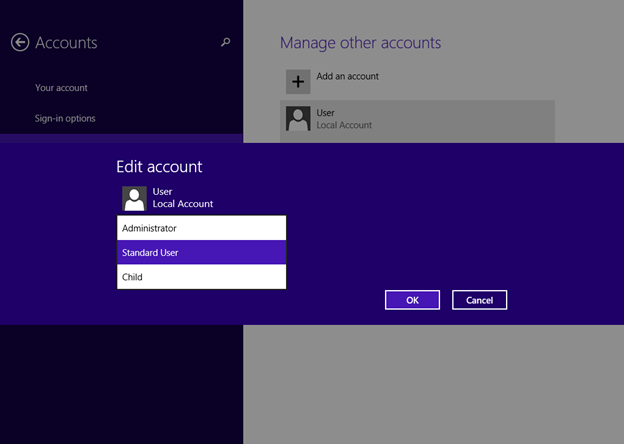
By default, the new user has standard rights, but this can be changed by returning to the PC settings screen. In the Other accounts tab, click on the user whose rights you would like to change. The Edit button will appear, and you will be able to choose between three account types: Standard User, Administrator, and Child.
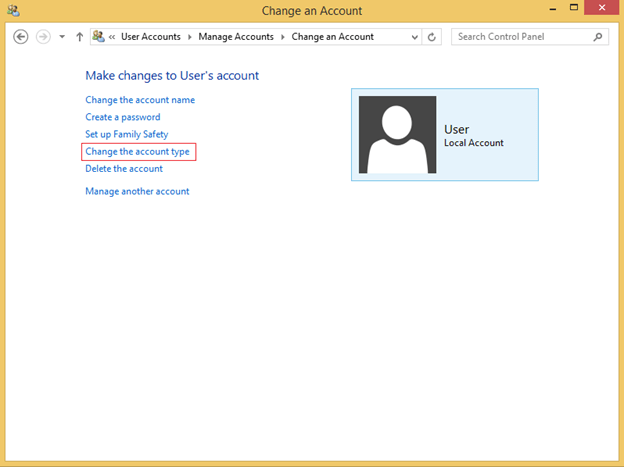
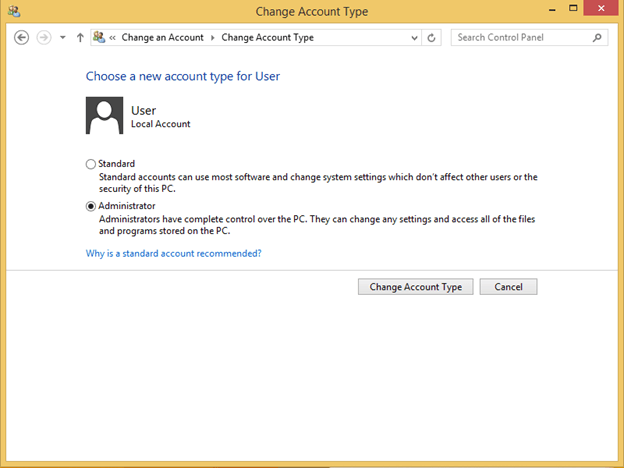
You can also change the account type via the Control Panel. To do that, go to Accounts and Family Safety à User Accounts à Manage another account. Then, left-click on the new user, click ‘Change the account type’ in a separate tab, and select the desired type.
Creating a New User in Windows 7
Step 1: Open the Control Panel
Click the Start button in the lower-left corner of the screen. In the menu, select Control Panel to open the respective section.
Step 2: Open the account settings
In the Control Panel, click ‘User Accounts and Family Safety.’ You will thus be able to manage accounts and family safety settings.
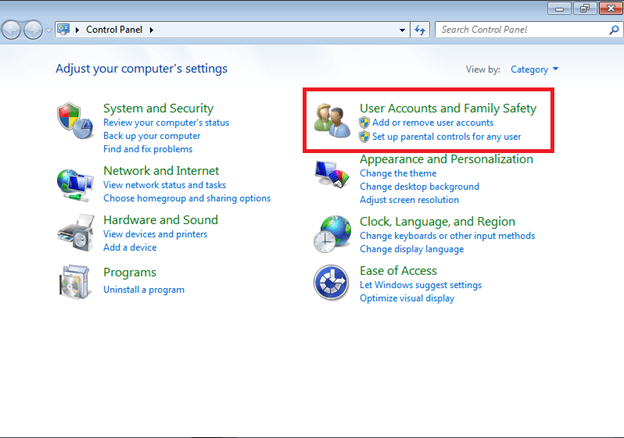
Then, select ‘User Accounts’ to access the account management options.

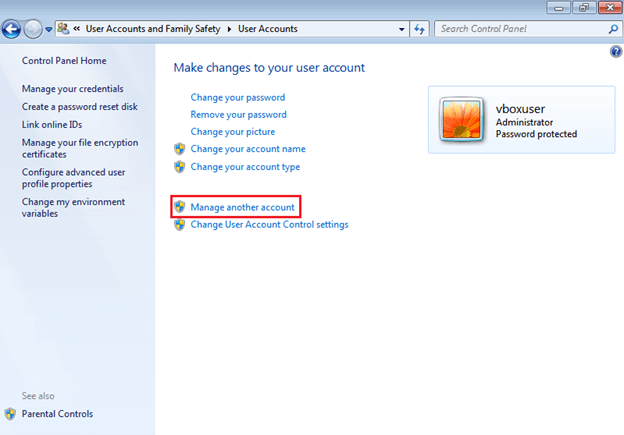
Step 3: Add a new user
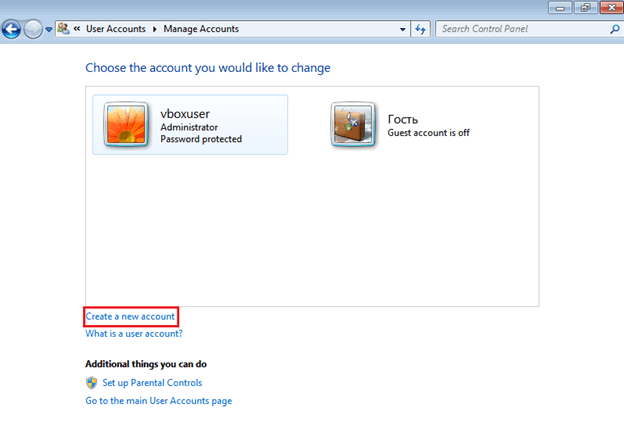
In the User Accounts menu, click ‘Manage another account’ to see a list of all the accounts in your system.
Then, select ‘Create a new account’ to start the process of adding a new user. This button is located at the bottom of the screen, right under the account list.
Step 4: Configure the new account
Enter a name for the new account. It will be used as a login and displayed on the welcome screen.
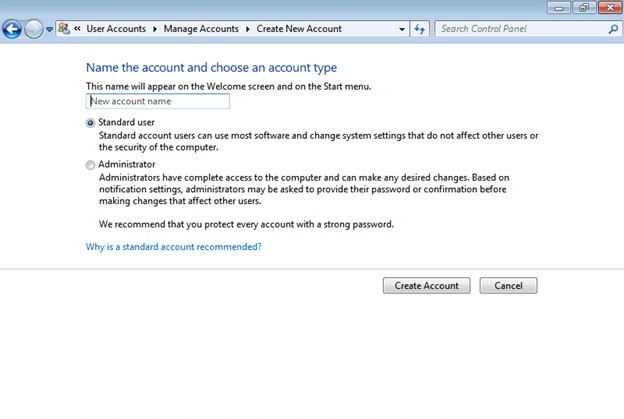
Select the account type. Windows 7 features two main types of accounts: Standard User and Administrator. The first is suitable for most users because it limits the right to make changes that may affect other users or system security. Select the appropriate type depending on the required access level. After selecting the account type, click ‘Create Account’ to complete the process.
