How to play Minecraft on LAN [TLauncher]
![How to play Minecraft on LAN [TLauncher]](https://i.tlauncher.org/images/open-lan-img-en.png)
The game has long introduced the option to create a local server in your own world, and all who are on your local network will be able to connect to your server. In general, everything is simple, but there are many limitations, in this article all is described in detail. Select the desired configuration type from the contents and follow the steps described.
Contents:
Server Configuration When You Are on the Same Wi-Fi or LAN Network with Another Player
Server Configuration When Playing over the Internet with Another Player Using Hamachi
Setting up a Local Minecraft Server with Mods
Possible Problems and Solutions
Server Configuration When You Are on the Same Wi-Fi or LAN Network with Another Player
If several PCs are not far from each other and are on the same Wi-Fi or LAN network (connected by cable), then this setting will suit your case.
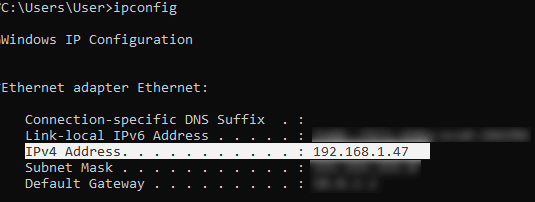
Windows: On the PC where the server is to be started, open the Start menu and enter cmd in the search to open this program:
In the opened window, type ipconfig and press enter. Look for your local IP, which starts with 192.168.*.* , for example, 192.168.1.47 (yours will be the other!), and copy it.
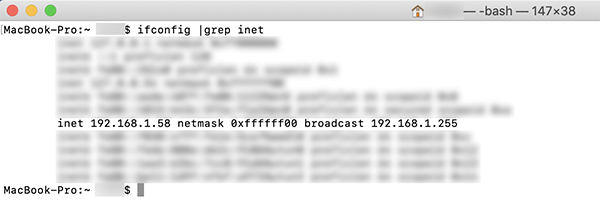
MacOS: To find the local IP, open the Terminal (you can type "Terminal" in the Mac search and find it), type ifconfig |grep inet in the window, look for the IP that starts with 192.168.*.* and copy it.
Now open TLauncher, choose the version with the TL icon and run the game (it is better to login to the TLauncher.org account). If you select the version without TL icon, you will not be able to connect to the server without a Mojang license.

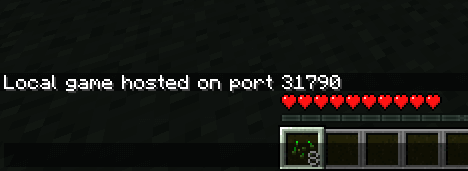
Go to your world and in the Pause menu (Esc) click Open to LAN. The chat will display a message about the successful opening of the server, as well as the server port, 31790 in the example (you will have another).
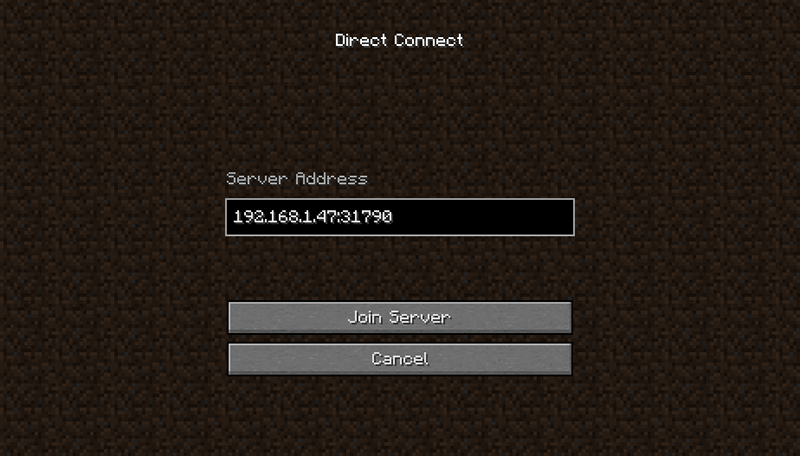
Now on another PC that needs to be connected to your server, you should also open the version with the TL icon (also, the version of the game must be the same as on the first PC), go to Multiplayer, open Direct connect.
Now enter the IP address + port that we got earlier, 192.168.1.47:31790 in the example. If everything is OK, the connection will be established! You can now play on the server with a friend.
Server Configuration When Playing over the Internet with Another Player Using Hamachi
If you cannot be with another player on the same network physically, because PCs are far from each other, you can create a special network over the Internet using Hamachi.
On both PCs, do the following: Create a Hamachi account and download the program (after clicking on the link, the Download button is in the center).
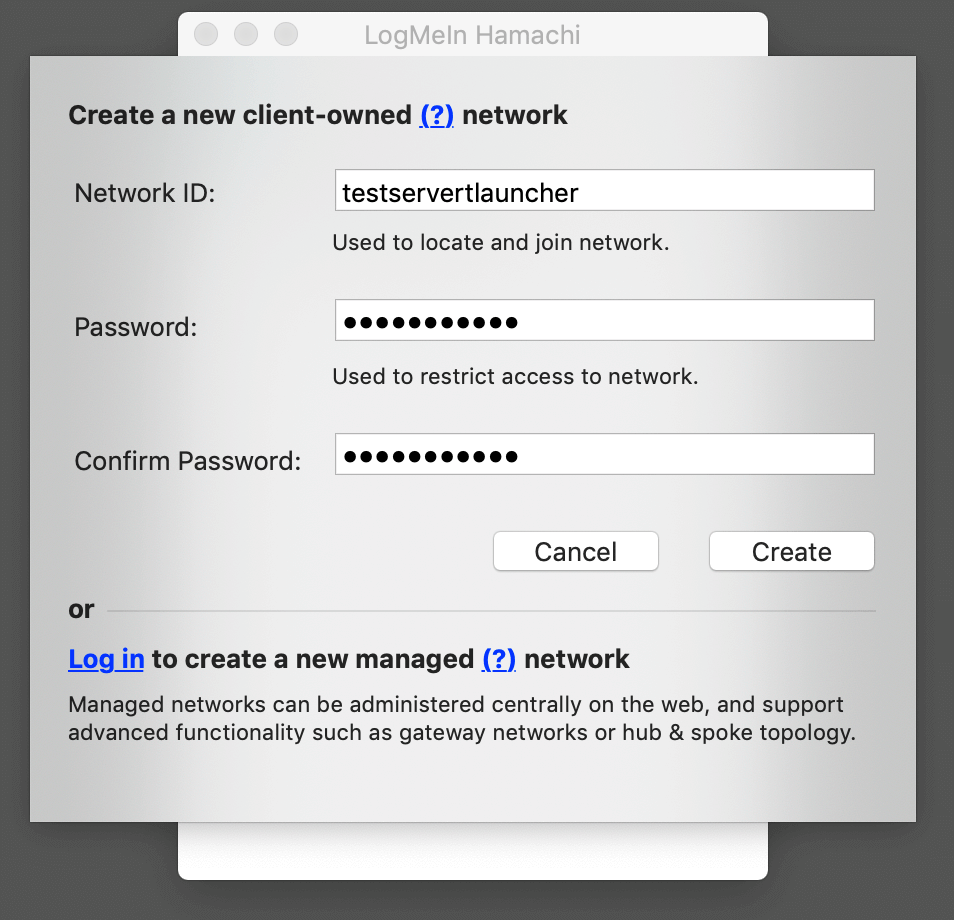
Install the program and authorize under the created data. Now, on one of the PCs logged in Hamachi click on "Create a new network", enter ANY network name and any password. The new network will appear in the window.
Now open TLauncher, choose the version with the TL icon and run the game (it is better to login to the TLauncher.org account). If you select the version without TL icon, you will not be able to connect to the server without a Mojang license.
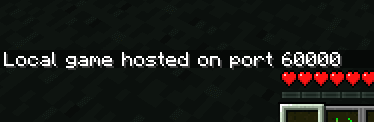
Go to your world and in the Pause menu (Esc) click Open to LAN. The chat will display a message about the successful opening of the server, as well as the server port, 60000 in the example (you will have another).
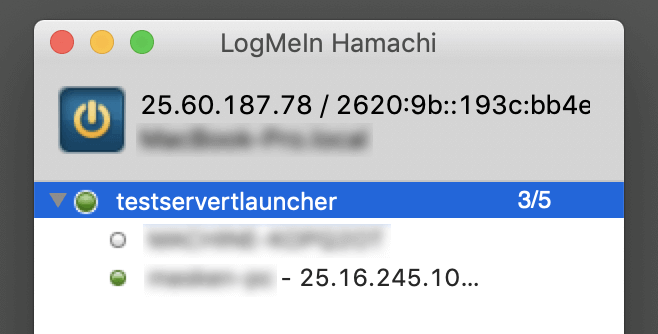
On another PC click on "Connect to an existing network", enter the network name and password created earlier. If the connection is successful, your friend's PC will be visible in the Hamachi window.
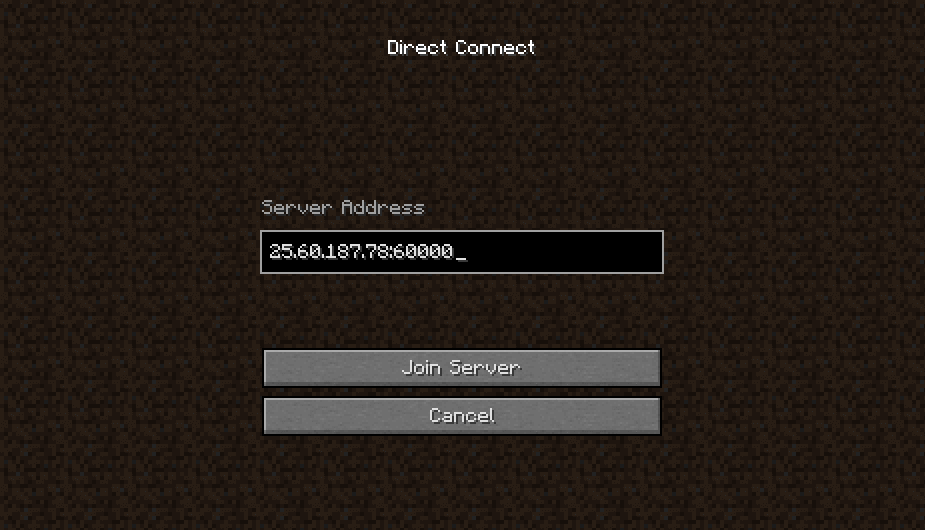
Then you should also open the version with the TL icon on another PC (also, the version of the game must be the same as on the first PC), go to Multiplayer, open Direct connect.
Now, enter the address from Hamachi in the IP field (of the PC, on which the server is opened) + port that we got earlier, 25.60.187.78:60000 in the example. If everything is OK, the connection will be established! You can now play on the server with a friend.
Setting up a Local Minecraft Server with Mods
Once you have configured the server to play on the same WiFi (LAN) network or using Hamachi, you can install mods and play with your friends with them. The instruction is very simple.
Install on all clients exactly the same mods, everything should be identical, also the Forge version itself should be the same, for example, ForgeOptiFine 1.12.2. Remember that the version should be with the TL icon!

Now create and connect to the server according to the same instructions above, depending on your network. Done, you can play Minecraft with mods!
Possible Problems and Solutions

- When connecting to the server "Invalid Session" or "Check User Name" error appears.
Solution: You need to run the version with the TL icon (otherwise you need a game license). If you run precisely this one, check whether in "Account Management" -> "Use TLauncher skins" checkbox is activated (in the launcher).
- When connecting to the server "Io.netty.channel.AbstractChannel$AnnotatedConnectException: Connection time out: no further information" error appears.
Solution: The game could not find information about such a server, so the network configuration is not correct. Try to disable anti-virus and firewall on the host computer or configure it correctly.
- When connect to the server, chunk loading is in progress, but immediately after that the server drops the connection (there is a disconnection).
Solution: The network configuration is correct, but the antivirus and firewall are dropping the connection. Disable them or configure them properly.
- When connecting to the server the following appears: 1.14.2: Bad packet ID 26; 1.13.2: Bad packet ID 27; 1.7.10: is stuck on Logging in... or "received string length longer than maximum allowed"
Solution: The length of your nick more than 16 characters, make it shorter.