A launcher with mods – TLauncher! Mod-pack system is already available!
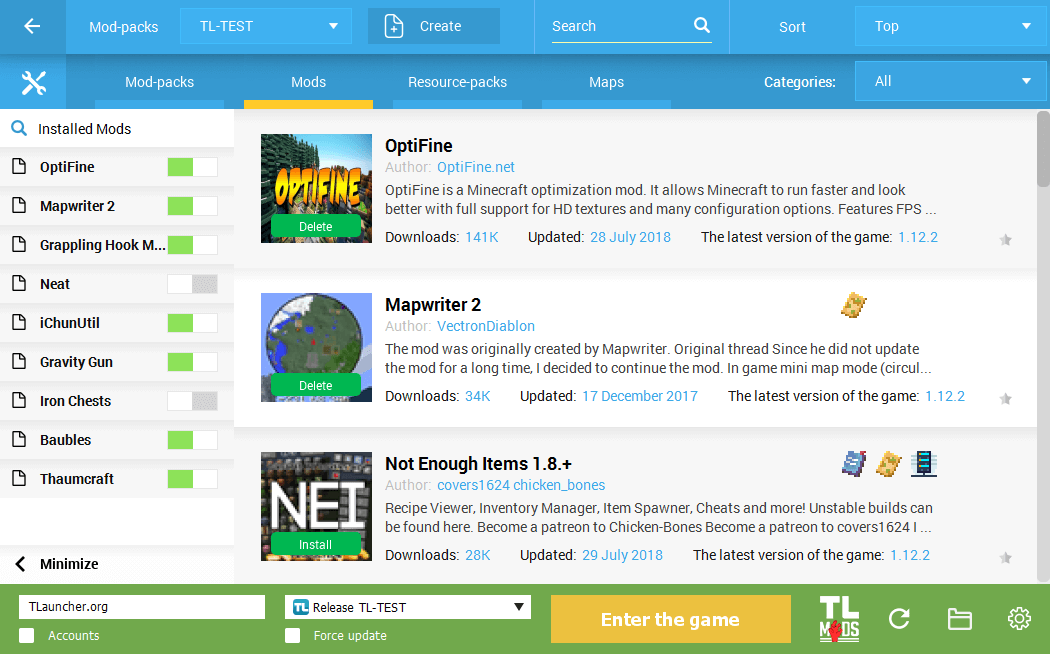
We’ve been working hard for a long time for the features really useful to you – a Mod-pack system (Mod-pack = a collection of mods) and we present it to the general public at last. This article contains everything you need to know about this system and why it’s one of the best Minecraft launchers on the market.
Download the launcher here:
Attention! This system is available only in the newest version of the launcher, if you have a current version 2.22 or lower, you will have to update it. Download TLauncher on direct links: Windows, Linux/OS X.
Please take into account that the testing is still in process, so some errors may occur. We will fix them and eventually all the problems should be eliminated.
As soon as you start our newest version of the launcher you’ll notice a new button "TL MODS" beside a big and yellow one. This particular new button opens a page with mod-packs and other controls.

Press the button, and cash which is renewed periodically will be downloaded and then the mod-pack page will be opened at once. The interface is intuitive, so you can sort it out even without guides. Now we’ll consider main functions.
The initially opened tab is the “Mod-packs” tab – these are ready-to-use collections with various mods centered around a particular theme. After a while you’ll be able to publish your manually created packs in the common list, but this feature will be available later.
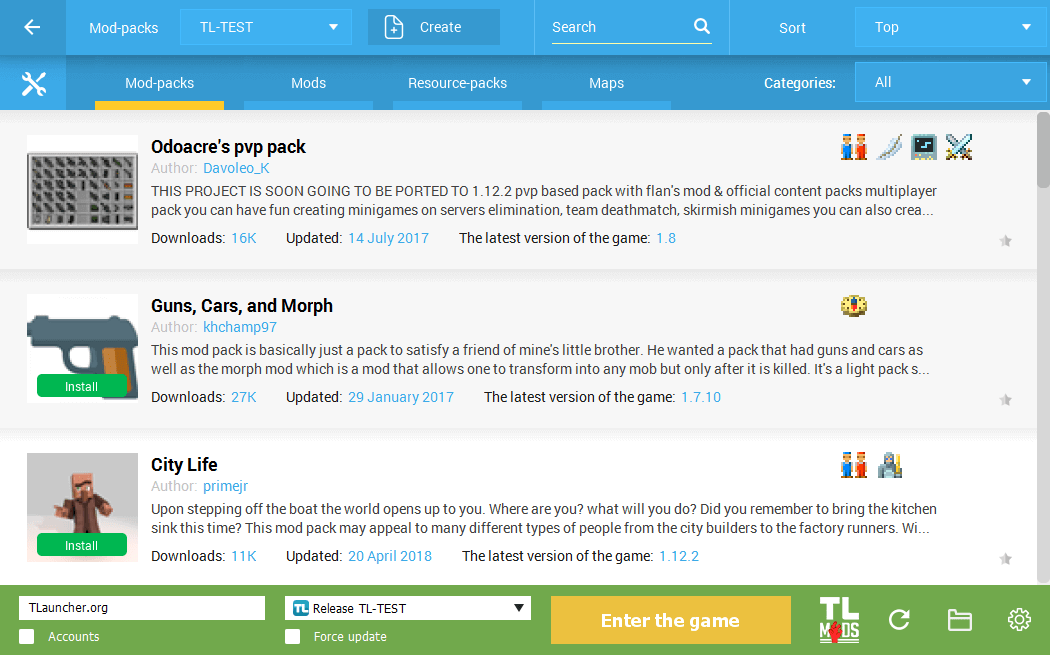
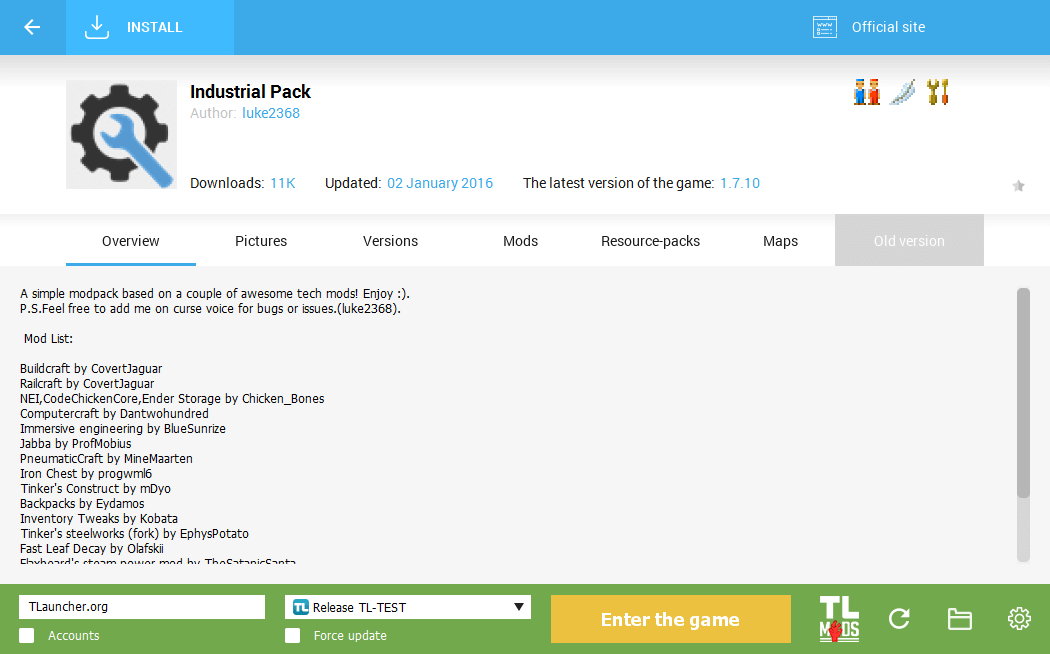
As you’re scrolling through the list you may be interested in something, so you can instantly press the "Install" button or click the mod-pack area to open a full description.
On this page you can see a text description and the following tabs: Pictures, Versions (different versions of the same mod-pack), Mods (the ones which are included in the pack), Resource-packs and maps (if available).
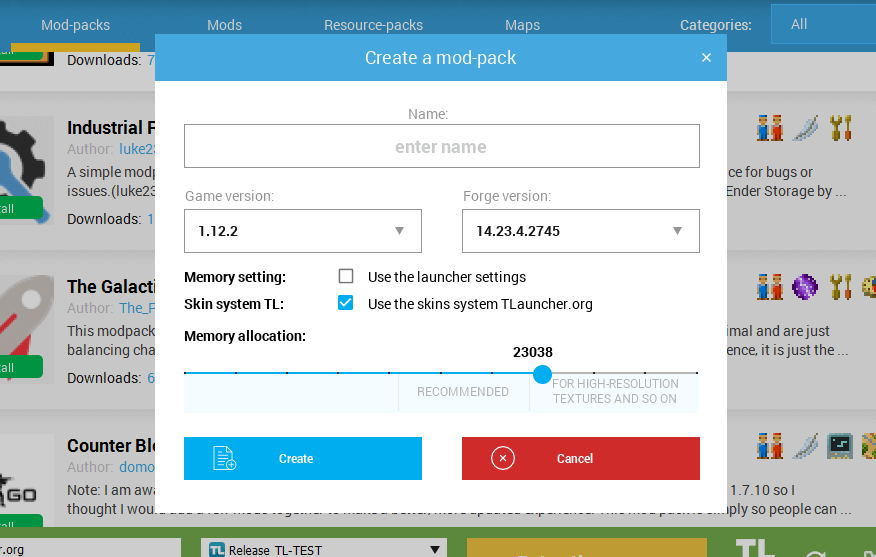
It’s obviously much more interesting to put together your own mods into a mod-pack. You can do it easily with us, and firstly you should create a basis – a mod-pack itself. Find a "Create" button at the top, press it and enter the mod-pack’s name – absolutely anything you like.
Then choose a Minecraft version which fits you the best or which, for instance, has more mods compatible. Afterwards choose a Forge version – if you don’t know the purpose of this step, leave the newest one chosen.
You may also uncheck the "Use the launcher settings" checkbox related to memory – this is how you can choose a preferable RAM value for this mod-pack when you use high-resolution textures. But if you leave it checked, everything will work as fine as it should. And, to finish customization, press the "Create" button..
Your pack’s name should appear in the list beside the line "Mod-packs" – it means the pack was created successfully. Now you can move to "Mods" page to install them into our new pack.
There are no restrictions regarding the amount of mods in a mod-pack, you can pick as many as you like, but still within reasonable limits. We have a rather advanced mods installing system – if it requires an API (library), the launcher will automatically install it for you. Now it can be easily said that a launcher with mods is TLauncher!
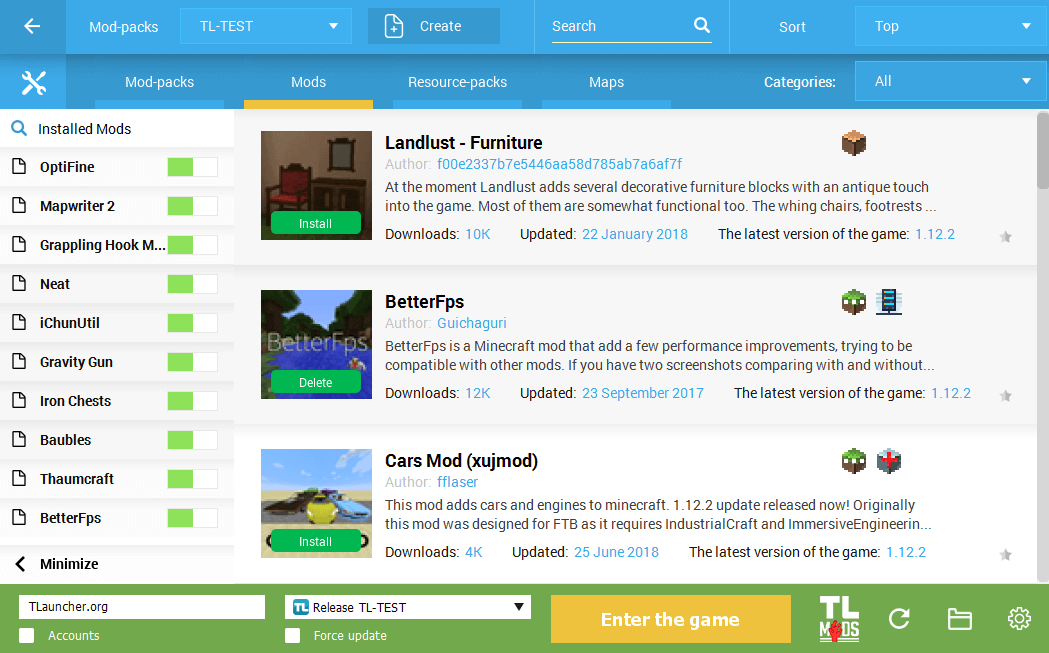
If you have many mods in the pack, you can simply search for them in your installed mods’ list – you just have to press the list’s name (beside the blue magnifying glass icon) and type the mod’s name – it should be found immediately. Additionally, a switch next to each mod’s name allows to disable the mode (turning the switch grey), which surely saves your time – you don’t have to delete it from the game’s folder and then to turn it on again if necessary.
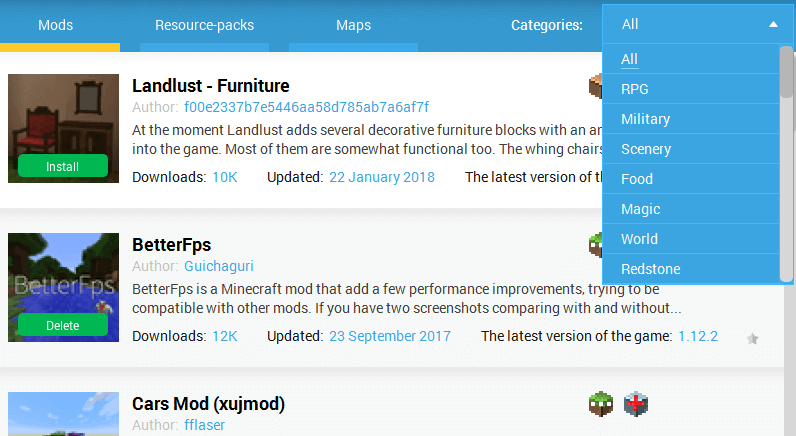
These nice icons to the right of every mod stand for categories – if you point at an icon, you’ll know the name of the category. And, if you want to sort the list by the desired one, you just have to choose it from the top-right category list.
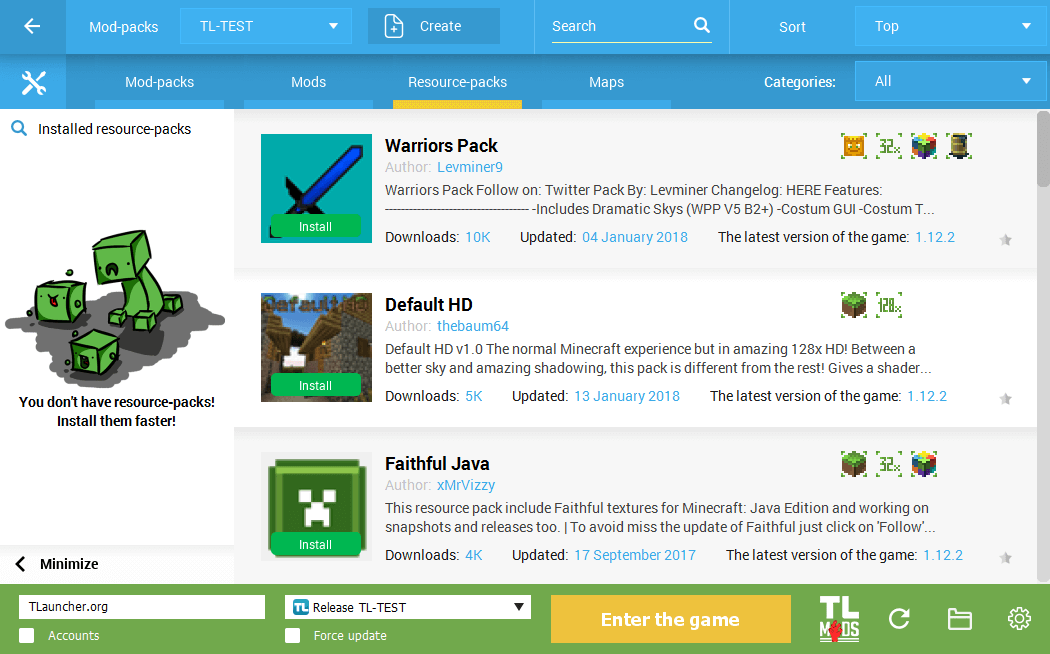
As soon as you’ve picked up mods you can move to resource-packs. Just proceed to their page and begin to search for interesting ones – as always, you may use categories for fast sorting. Don’t forget to activate them in the game’s settings!
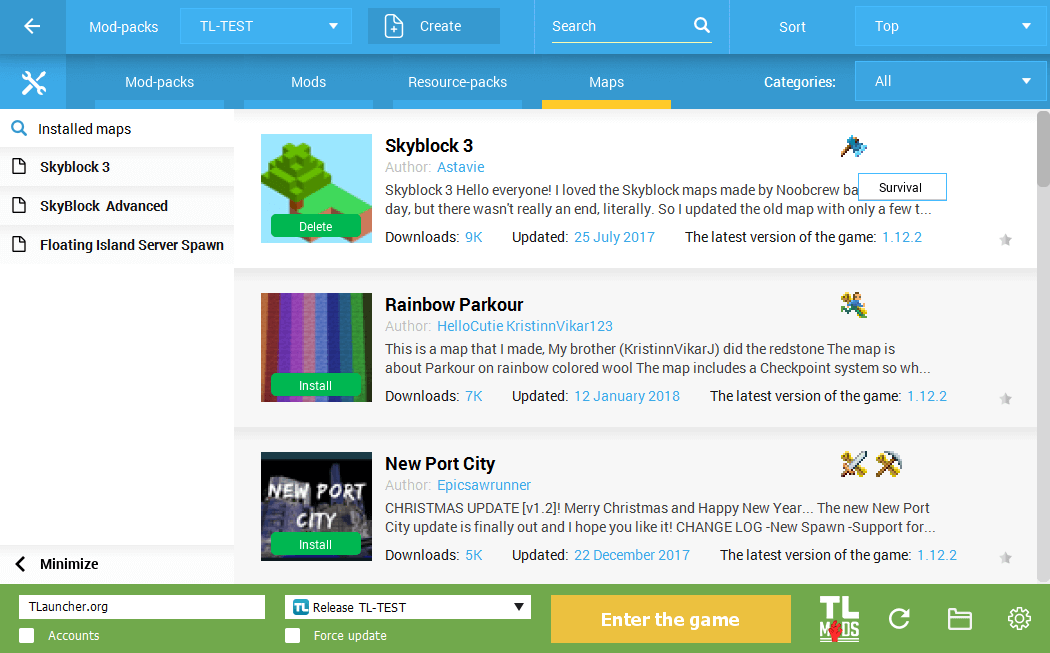
Besides, if you don’t want to build, you may as well search for maps by moving to a corresponding tab. An enormous list and a selection of categories won’t let you get bored!
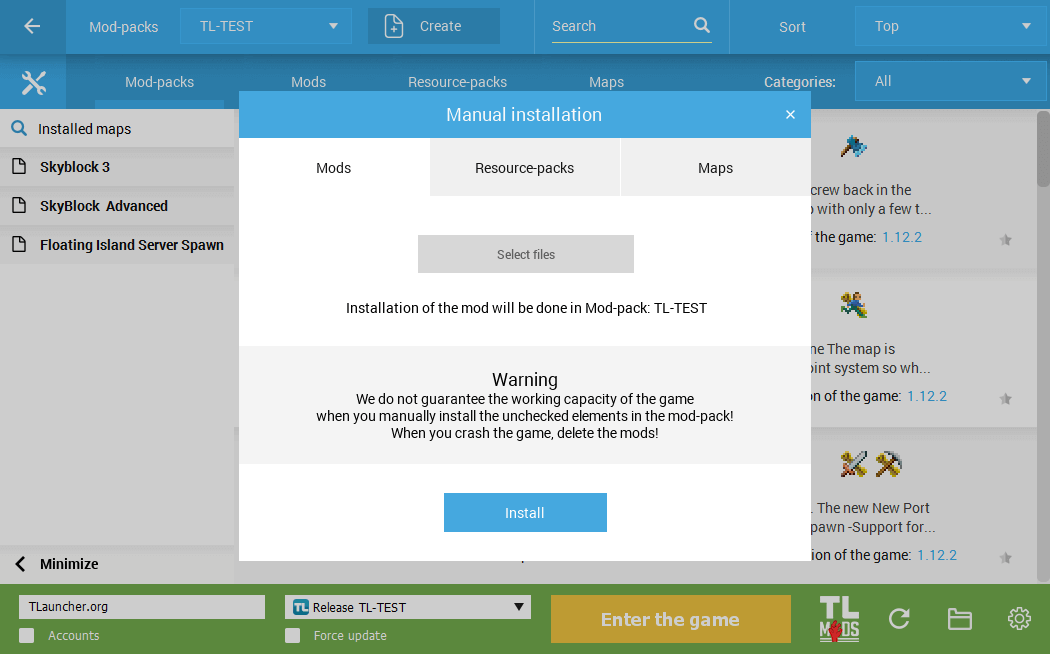
Practically it’s all about the basic functions – everything is simple and clear, and it really works. But it’s not all about it – there are two more important functions ahead. One of them is a manual installation, which is helpful when you need to install a mod we don’t have (though eventually all of them will be available), a resource-pack or a map.
To perform that, just press the wrench-and-spanner button to the left of the Mod-packs tab. Choose “Manual installation” option – a window will pop up in which you can select whatever you want to install, press the button to choose a file and then click “Install” – everything is ready!
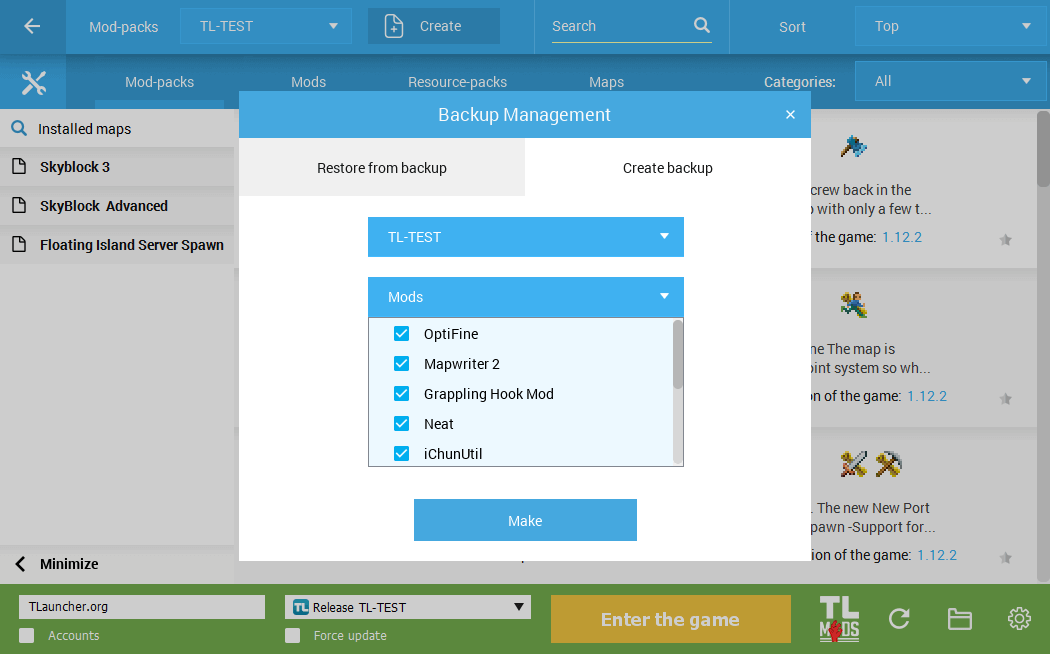
Another significant feature is backuping. It not only helps to save your packs in one piece, but to share them with other players, for example, with your friends. Just press the above-mentioned wrench-and-spanner button, choose "Backup Mods" and move to the tab "Create backup", where you can choose one mod-pack or all of them and afterwards backup them.
Everything your friend will have to do in his client is only to choose the "Restore from backup" tab and select your backup file – the launcher will do the rest!
We’ll move forward and invent new features related to mod-packs, hope you’ll like everything! Thanks for being with us!


Comments (125)